
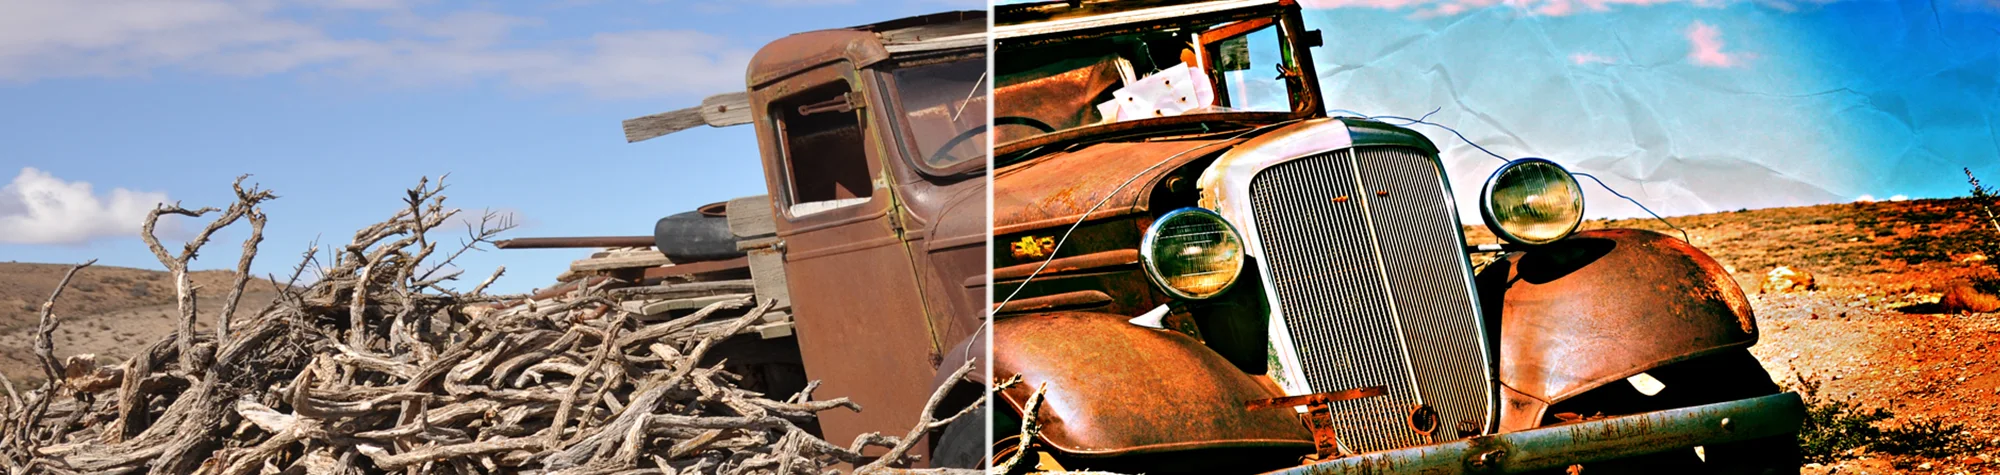
Create a Lomo Effect in Photoshop
The Lomo effect is quick to create and incredibly effective. It works perfectly for photos that feel a little odd, off-angle, or blurry—images you’re not sure what to do with but don’t want to delete.
Lomography-style photos use strong contrast, bold colours, dark vignettes, and subtle cross-processed colour tints. Once you understand how these elements work together, you can turn unusual or imperfect photos into eye-catching images with real character.
Watch the Lomo Effect Photoshop Tutorial
Watch the full tutorial below to see how to create a Lomo effect step by step.
What You’ll Learn in This Tutorial
In this lesson, you will learn how to:
-
Create a classic Lomo effect in Photoshop
-
Boost contrast and colour intensity
-
Add a strong vignette for depth
-
Apply cross-processed colour tones
-
Turn unusual photos into striking images
Who This Tutorial Is For
This tutorial is perfect for:
-
Photoshop beginners
-
Photographers experimenting with style
-
Anyone editing imperfect or creative photos
-
Designers looking for retro effects
Where You Can Use This Effect
The Lomo effect works great for:
-
Street photography
-
Creative and experimental shots
-
Retro-style edits
-
Artistic social media images
Professional Photoshop Editing Services
If you’d like professional photo editing or custom retro effects applied to your images, I offer Photoshop editing services for individuals and businesses.
Attribution and Licensing
freeimages.com/Piotr Menducki: http://www.freeimages.com/photo/old-car-1337224
freeimages.com/Adem Kaya: http://www.freeimages.com/photo/wrinkled-paper-1-1579769
Background Music: Sovereign Kevin MacLeod (incompetech.com). Licensed under Creative Commons: By Attribution 3.0 License http://creativecommons.org/licenses/by/3.0/
Subscribe for More Photoshop Tutorials
Subscribe to my YouTube channel for more Photoshop tutorials, creative photo effects, and professional editing tips.