
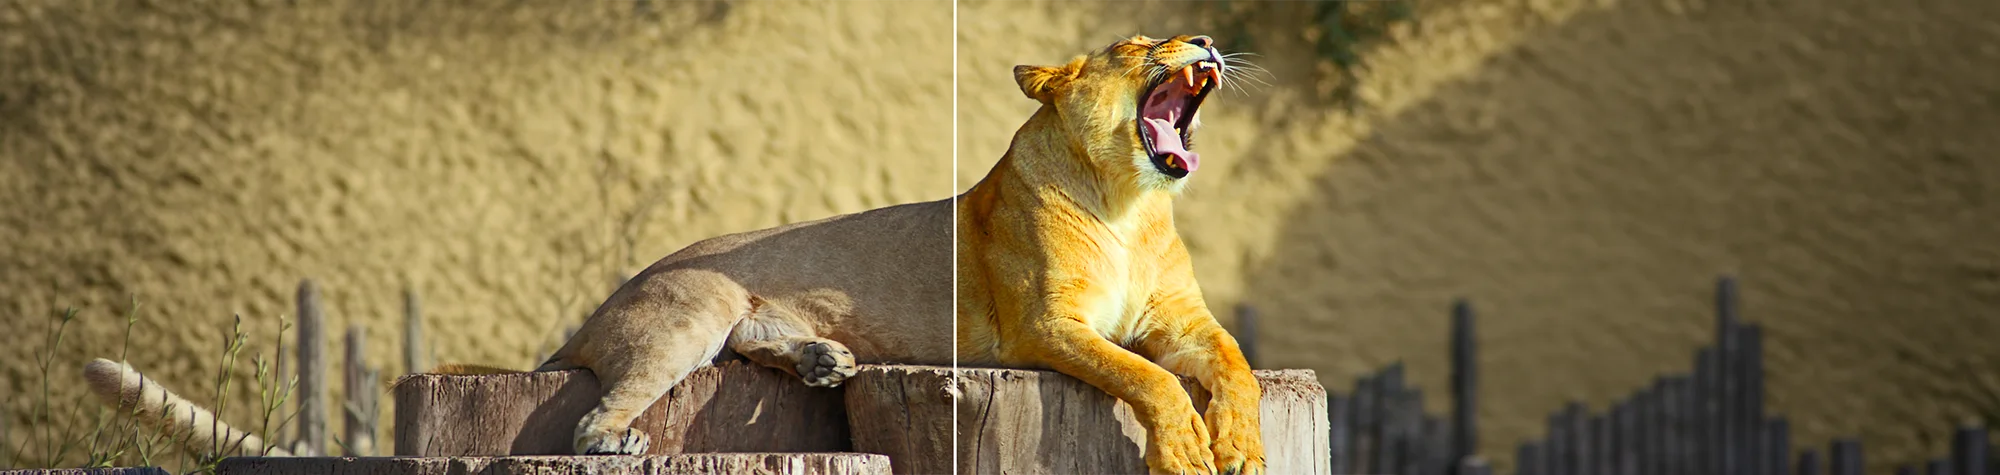
Make Pet Fur Pop in Photoshop
Have you ever taken a pet photo that looks dull and lifeless, no matter how much you try to adjust the colours? Getting fur to look rich, glossy, and full of detail can be tricky—but it doesn’t have to be.
In this tutorial, you’ll learn how to make fur in your pet photos really pop to life using just one simple adjustment layer. It’s fast, easy, and incredibly effective, bringing out colour, shine, and texture in animal fur.
Watch the Pet Fur Photoshop Tutorial
Watch the full tutorial below to see how to enhance pet fur step by step in Photoshop.
What You’ll Learn in This Tutorial
In this lesson, you will learn how to:
-
Enhance pet fur colour and vibrancy
-
Add gloss and detail to animal fur
-
Use a single adjustment layer effectively
-
Improve dull pet photos quickly
-
Make animals stand out naturally
Who This Tutorial Is For
This tutorial is perfect for:
-
Photoshop beginners
-
Pet photographers
-
Animal lovers editing photos
-
Anyone wanting quick, professional results
Where You Can Use This Effect
This fur enhancement technique works great for:
-
Pet portraits
-
Social media images
-
Prints and wall art
-
Professional pet photography
Professional Photoshop Editing Services
If you want professionally edited pet photos or realistic fur enhancements done in Photoshop, I offer Photoshop editing services for individuals and businesses.
Attribution and Licensing
freeimages.com/Juliane Riedl: http://www.freeimages.com/photo/lion-1250298
Background Music: Sovereign Kevin MacLeod (incompetech.com). Licensed under Creative Commons: By Attribution 3.0 License http://creativecommons.org/licenses/by/3.0/
Subscribe for More Photoshop Tutorials
Subscribe to my YouTube channel for more Photoshop tutorials, photo retouching tips, and creative editing techniques.